If you purchase an independently reviewed product or service through a link on our website, we may receive an affiliate commission.
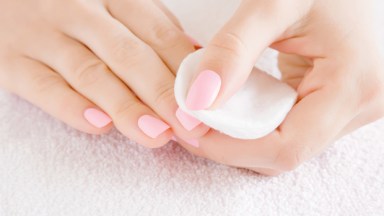
Dip powder is the latest nail trend to take the world by storm and it’s quickly replacing gel manicures. A dip powder manicure is a technique where you actually dip your nails in colored powder, (or you can use a brush), and then seal that color in with a clear top coat. The manicure can last up to one month and it is praised for being chip-free, plus, you don’t have to use a UV light to seal it to your nails, unlike gel manis. A UV light isn’t the only difference between the two – dip manicures tend to be thicker, which is why they last longer, and therefore, may seem harder to remove. However, we have all the tips you need to remove your dip powder on your own, from home, and you can see them all below.
How to remove dip powder
While you may think that removing powder dip is different than removing gel, it’s actually a similar process. Syreeta Aaron, LeChat Nails Educator, shared with HollywoodLife EXCLUSIVELY, “Removing dip nails is very similar to removals of any artificial nail enhancement.” Luckily, Syreeta shared the exact steps you can take to remove the color from your nails and you can follow them below.
Step 1: “It’s always best to file off the top layer of the artificial nail (the dip nail).
Step 2: “Once that top layer has been removed you may then soak in pure acetone for a faster soak. The less acetone percentage of a remover can prolong the process. Soak in a small bowl for at least 5 to 7 minutes.
Step 3: “Then take a paper towel or your finger to rub off the first layer then file off the product that has been soaked. Repeat the process as needed until the dip has been completely removed from your nail.
Step 4: “Once the product has been completely removed you may then begin a manicure process. This process is needed to replenish oil and nutrients back into your natural nails.”
Instead of wrapping your nail in foil and cotton covered in acetone, Syreeta suggests fully soaking your nails for 5 to 7 minutes as the dip is thicker and harder to remove than gels.
Follow up steps
As with any long-term manicure, (gels and dip), a common effect is thin, brittle nails. While you have the dip manicure for weeks, your nails are constantly growing underneath and that fresh nail can become flimsy when the color is removed so it’s important to take proper care after removing the dip. First of all, it’s important to never pick or peel off your manicure as this can remove layers of your nail and be harmful.
While you may love your dip nails and can’t wait to get another dip manicure after removing your original one, it’s best to hold off for a little while. The reason for this is you want to give your nails a breather in between manicure appointments and not rush into another harsh treatment. Instead, remove your dip powder and then apply a nail strengthener for the next week to keep your nails fresh and healthy. You can cover the strengthener with a regular polish color, but you may want to hold off on any other long-term manicure.
If you’re looking for a good nail strengthener, you’re in luck, because we rounded up some fabulous options for you. The Hard As Hoof Nail Strengthening Cream is one of the best and it has over 42,000 positive reviews on Amazon. The cream helps weak nails harden while also softening cuticles. One customer gushed about the product, “I took my acrylic nails off and my natural nails were extremely damaged……thin as paper and splitting I thought about putting the acrylic back on. I used nail strengtheners that paint on the nails that cost $40 and still they looked bad. Tried this product and within 7 days my nail were looking and feeling great and my cuticles are healthy and soft.”
A great polish to wear in between manicures is the OPI Nail Envy Nail Strengthener. With over 27,000 positive reviews, this polish is top-notch. It’s formulated with hydrolyzed wheat protein and calcium that work together to make your nails stronger and healthier. Customers swear by this polish and one user even called it “miracle polish,” writing that, “After 2 months, the difference is amazing. (I added a thin coat of beige color on Day 2 to hide the fact that I frequently have dirt under my nails!) Because of my lifestyle I like to keep my nails short but at least they look healthy and no more splits! It worked for me. Hope it works for you, too. Well worth the price.”
Last but certainly not least is the Nail Tek Intensive Therapy 2. This treatment seals your nails while they’re weak and brittle so they do not get damaged any further. It’s the perfect polish if your nails are soft and peeling after dip powder. Even better, it’s 100% cruelty-free and never tested on animals. One very satisfied customer wrote, “I’m telling you .. I had about given up!! I was sick and tired of cutting down my nails trying to get rid of all that damage .. trying umpteen different products to keep them from splitting apart .. working with them. YUCK! Even thought this product was so much cheaper than others I had tried I thought I’d give it a try! WOW!! What a difference. I just did my manicure .. NOT ONE SPLIT NAIL!! What a change!! I felt I just had to take the time and let others know about the product. I depend on other Amazon Reviewers .. I owe it to you also! Try it! I think my split nails are due to various meds I take and or a thyroid issue .. who knows .. all I know was it was really bad .. and this product is the FIRST that solved the problem! TRY IT!!”